Ubuntu 에서 특정 사용자의 VirtualBox VM을 root 계정을 통해 실행시키려 했더니,
COM 초기화 실패 에러가 난다. 왜그런가 했더니, 특정 사용자의 Home 디렉토리 환경이 안잡힌게 문제였다.

보통 sudo 사용 시
$ sudo -u userid 커맨드..
사용하는데, 이것 말고, 한가지 옵션 (-H ) 만 더 넣어주면 해결 된다.

즉,
$ sudo -H -u userid 커맨드...
처럼 -H 옵션을 넣어주면, 사용자의 Home 디렉토리를 사용하게 된다.
반응형
블로그 이미지

Good Joon

IT Professionalist Since 1999

,
dpkg -l

하믄 됨
반응형
블로그 이미지

Good Joon

IT Professionalist Since 1999

,
일단, VMWareTools 가 설치되어 있어야 한다.

VMWareTools 는, VMWare 의 Guest OS 실행하면, 하단에 나오는 Install 버튼 누르고,
/dev/cdrom 을 mount 한 다음, 안에 있는 VMWare어쩌구_install.pl 파일인가를 실행해주면 된다.
마운트 하기 : $ mount /dev/cdrom /media/cdrom

툴이 설치 완료 된 후에, Shared Directory 를 VMWare 의 VM 설정 중 Option 에서 해주면 일단 환경은 된것이다.
 (Guest 재부팅 필요 없음)


위 처럼 lsmod 했을 때, vmhgfs 가 로드 되어있으면 문제 없는 것이다.

만약 로드안되어있으면
$ modprobe vmhgfs
를 한다

잘 되었다면
/mnt/hgfs
에서 공유된 디렉토리를 확인할 수 있다.
반응형
블로그 이미지

Good Joon

IT Professionalist Since 1999

,

Windows7 을 깔면서, VMWare 를 7으로 업데이트 하고, 이전 Ubuntu Guest 를
디렉토리 복사 해서, VMWare 에 물렸는데, 이놈이 ifconfig -a 로 보면, eth0 가 안올라 온다.
그리고, eth1 이 올라오면서, 에러가 나서 IP 할당도 못받아 있다.

$ lspci
해서, Ethernet 이 인식이 됐는지 우선 확인해 보고,

$ dmesg | grep eth
해보면, 부팅할 때 뭔가 문제가 있었나 볼 수 있다.

내경우는
udev: renamed network interface eth0 to eth1
이라는 퐝당한 메세지가 잡혔다.

원인은, MAC Address 가 바뀌어서 그런 듯 하다.
방법은 두가지 이다

  • edit /etc/udev/rules.d/70-persistent-net.rules and correct the eth0 to MAC address mapping, or
  • edit /etc/network/interfaces and change eth0 to eth1
  • 아래 방법은 eth0 을 못쓰고, eth1 으로 쓰겠다는 것이니,
    위의 방법을 선택하면 된다.

    실제로 70-persistent-net.rules 파일을 열어보면

    위 처럼 되어 있다.

    여기서 두번째 (빨간색) 놈은, 부팅 하면서 udev 가 추가해준 것이다. 즉, 현재 설정이다.
    오른쪽에 보면 현재 MAC Address 가 있는걸 볼 수 있다. 또, 가장 마지막에 보면 NAME="eth1" 으로 되어있다.

    그럼, 간단하게, 위에있는놈을 삭제해주고, NAME="eth1" 을 eth0 으로 바꿔주고
    시스템을 reboot 한다.

    잘 작동 된다~

    반응형
    블로그 이미지

    Good Joon

    IT Professionalist Since 1999

    ,
    우분투를 사용하시면서 자신의 시스템 정보를 볼 줄 몰라서 답답해하시는 분들이 계실 거라 생각합니다. Ms윈도우에서 많은 시스템정보뷰어 프로그램들이 있습니다. SIW(System Info) 또는    SiSoftware Sandra 와 같은 유명한 프로그램을 활용하여 손쉽게 볼 수 있습니다. 이번 글을 통하여 이들 프로그램과 같이 자신의 시스템 정보를 자세하게 볼수 있으며 터미널과 X윈도 상에서 어떻게 볼 수 있기에 대해 알려 드리겠습니다.
    ※ 이 문서를 읽기 전에...

    누구를 위한 글인가? 그 대상은?
    우분투 리눅스를 데스크톱 용도로 사용하는 모든 사람에게 필요한 글입니다.
    먼저 알아야 될 지식
    터미널에 대한 기초 사용법과 우분투의 Gnome(윈도 매니저) 을 약간이나마 사용해보신 분들 입니다.
    ※ 목차

     1.터미널
    ㉮ 그래픽
    ㉯ 오디오
    ㉰ 소프트웨어 버전
    ㉱ 네트워크
    ㉲ 프로세서
    ㉳ 메모리
    ㉴ 하드디스크
    ㉵ USB 장치
    ㉶ 기타

     2.GUI (X윈도)
    ㉮ Sysinfo
    ㉯ Hardinfo
    ㉰ lshw-gtk
    1.터미널

     ㉮ 그래픽
        $glxinfo : 상세한 OpenGL, Xserver, 그래픽 카드 정보
        $glxinfo | grep direct : Direct 3D 랜더링 사용 가능여부
        $glxinfo | grep vendor : 그래픽 카드 공급 업체 정보
        $lspci | grep VGA : 그래픽 카드 장치이름
        $Glxgears : 3D 밴치 마킹 (터미널에 FPS 표시, 500FPS 이상 Compiz 실행 권장)
        $Xrandr : 지원되는 디스플레이 해상도 표시

     ㉯ 오디오
          $lspci | grep Audio : 오디오 장치이름 보기
          $aplay –list-devices : 좀더 많은 오디오 장치 정보 보기
          $amixer -옵션 : Alsa 사운드 믹서 정보 보기 밑 설정
            (자세한 내용은 $man amixer)

     ㉰ 소프트웨어 버전
          $cat /etc/issue :  현재 배포판 버전 보기
          $apt-cache showpkg 패키지 이름 : 패키지에 대한 등록정보 표시
          $uname -r  : 현재 시스템의 커널 버전 보기
          $uname -a : 시스템의 모든 커널에 대한 자세한 정보 표시

     ㉱ 네트워크
          $lspci | grep Ethernet : 이더넷 장치 보기
          $Ifconfig : 네트워크 인터페이스, Ip에 대한 정보 보기

     ㉲ 프로세서
          $cat /proc/cpuinfo : 프로세서의 정보 보기
          $cat /proc/loadavg : 프로세서 로드 평균 값 표시
          $Top : 프로세스 정보 및 목록 보기

     ㉳ 메모리
          $cat /proc/meminfo : 메모리 정보 표시
          $free -m : 메모리 사용량 표시

     ㉴ 하드디스크
          $df -H : 파티션 정보 보기
          $sudo fdisk -l : 하드디스크 장치 및 마운트 포인트 보기

     ㉵ USB 장치
          $lsusb : USB 버스에 연결된 장치 보기

     ㉶ 기타
          $lshal -m : 하드웨어 변동사항 모니터링
          $lspci  : 모든 PCI 장치 보기
          $hwinfo --short  : 모든 하드웨어 자세히 보기 (hwinfo 패키지 설치 해야됨)
          $uptime : 현재 컴퓨터 사용 시간 표시
          $lshw : 시스템의  하드웨어 목록 장치명 별로 자세히 표시
          $sudo lshw -html > 파일명을 지정해주세요.html : HTML로 하드웨어 목록 출력

    (sudo lshw -html 은 전체적으로 상당히 자세한 정보를 보여줍니다. 추천!)

    반응형
    블로그 이미지

    Good Joon

    IT Professionalist Since 1999

    ,

    How to enable active corners aka Exposé in Ubuntu 9.10 with Ubuntu Tweak

    Wednesday, November 25, 2009 posted by andreea

    If you always wanted the Exposé effect on your Ubuntu Desktop, here you go!  Active corners, known from Mac as Exposé, allow you e.g. to see all your open windows at once just by one mouse move into the corner of the desktop. Very useful if you are a multi-tasking god or goddess!

    First open you terminal and copy & paste:

    sudo apt-key adv –recv-keys –keyserver keyserver.ubuntu.com FE85409EEAB40ECCB65740816AF0E1940624A220

    Log in with your admin password and continue:

    sudo gedit /etc/apt/sources.list

    Then add the following lines at the end of the file:

    deb http://ppa.launchpad.net/tualatrix/ppa/ubuntu karmic main
    deb-src http://ppa.launchpad.net/tualatrix/ppa/ubuntu karmic main

    The source of Ubuntu tweak will be added to your repository. Updates for Ubuntu-Tweak will be installed automatically in future. Install Ubuntu-Tweak:

    sudo apt-get update
    sudo apt-get install ubuntu-tweak


    위 방법으로 커맨드에서 하던지, Synaptic 관리자에서 해줘도 된다.
    내 경우, 첫번째 apt-key 쪽 명령이 안먹혀서 Synaptic 관리자로 했음.

    Before using Ubuntu-Tweak, make sure you enabled visual effects for your desktop. Go to System/Preferences/Appearance an check under Visual Effects “Normal”.
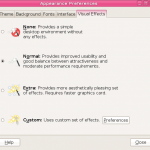
    visualeffects

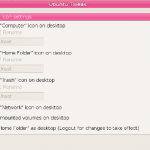
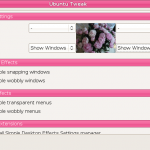
    Check your system tools for Ubuntu-Tweak, open it and go to Desktop, then to Compiz Fusion as you can see here:
    tweak tweak2 tweak3

    Now you can enable a function for every corner, as you like. That’s it.

    결론은, Ubuntu-Tweak 을 설치하는 것인데, 위 Expose 기능 말고도, 다양한 Tweak 들이 있으므로, 필수적으로 설치하면 좋은 유틸이다~ 아이조아~

    반응형
    블로그 이미지

    Good Joon

    IT Professionalist Since 1999

    ,
    Ubuntu 의 Synaptics 에서 alien 패키지를 다운받는다.

    alien 은 Redhat 용 rpm 과 기타 OS 의 패키지들 간의 변환을 해준다.

    alien --to-deb <패키지이름> 하면
    *.dpkg 가 나오고,

    dpkg -i <dpkg 이름> 하면 설치 된다.
    반응형
    블로그 이미지

    Good Joon

    IT Professionalist Since 1999

    ,
    KDE 의 경우, Kompose 가 있지만, GNome 에는 없어서 참 아쉽다.
    Skippy 가 있어서 대체 가능하지만, 설치할 때 Compile 이 좀 어려웠기에
    컴파일 방법을 적어놓는다.

    1. Download skippy from:

    http://thegraveyard.org/files/skippy-0.5.0.tar.bz2

    This HOWTO was written for skippy version 0.5.0, hopefully it will work for future versions too.

    2. Untar the skippy source code into a directory:

    $ tar -xjf skippy-0.5.0.tar.bz2

    3. Switch to the untarred directory

    $ cd skippy-0.5.0.tar.bz2

    4. Install imlib2-dev, libxft-dev and libxmu-dev, since skippy needs them to compile:

    $ sudo apt-get install libimlib2-dev libxmu-dev libxft-dev

    5. Edit the Makefile so that it won't try to bind to Xinerama. 

    $ nano Makefile

    You want to insert a # at the beginning of lines 10 and 11, so that they look like this:

    #CFLAGS += -DXINERAMA
    #LDFLAGS += -lXext -lXinerama

    6. Compile the software:

    $ make

    7. Install the executable:

    $ sudo make install

    8. Copy the default config file to your home directory:

    $ cp skippyrc-default ~/.skippyrc

    9. Edit the default config file so that it uses Scroll Lock instead of F11 as the hotkey. I recommend this, because many Ubuntu applications use F11 (for instance, OpenOffice Writer uses F11 to display the Stylist, which is a very useful feature). On the other hand, I don't think the Scroll Lock EVER had a use. 

    $ nano ~/.skippyrc

    Change line 24 to read:

    keysym=Scroll_Lock

    10. Launch skippy:

    $ skippy

    11. Press Scroll Lock to see scaled-down versions of all of your windows. Some people have complained about skippy's performance, but it works very quickly on my ancient laptop. 

    Note that this version of skippy does not update the scaled-down windows in real-time.

    Hope this helps,

    -Paul

    컴파일 하고 install 까진 잘 되는데, 

    X Error of failed request:  BadWindow (invalid Window parameter)
      Major opcode of failed request:  2 (X_ChangeWindowAttributes)
      Resource id in failed request:  0x0
      Serial number of failed request:  112
      Current serial number in output stream:  114


    와 같이 에러 난다.

    http://www.mail-archive.com/debian-bugs-rc@lists.debian.org/msg142757.html

    위 글에서 얘기하는 것과 같이, Debian (Ubuntu 도 Debian 기반임) 에서는 안된다.
    Fedora 에서나 쓸 수 있겄다..


    반응형
    블로그 이미지

    Good Joon

    IT Professionalist Since 1999

    ,
    Ubuntu 9.10 설치하고 나서, 3D 와 2D 가속기능좀 쓰겠다고 FGLRX 를 설치했건만
    화면 해상도 안맞아서 아예 화면이 안떠버린다.

    이를 해결하기 위해 아래와 같이 하자.

    How I resolved:

    Reinstalled a clean copy of Jaunty.
    After applying updates, I opened Synaptic and removed all xserver-xorg-* useless packages (related to other VGA). Here's the list:
    xserver-xorg-video-all
    xserver-xorg-video-apm
    xserver-xorg-video-chips
    xserver-xorg-video-cirrus
    xserver-xorg-video-intel
    xserver-xorg-video-mga
    xserver-xorg-video-neomagic
    xserver-xorg-video-nv
    xserver-xorg-video-openchrome
    xserver-xorg-video-rendition
    xserver-xorg-video-s3
    xserver-xorg-video-s3virge
    xserver-xorg-video-savage
    xserver-xorg-video-siliconmotion
    xserver-xorg-video-sis
    xserver-xorg-video-sisusb
    xserver-xorg-video-tdfx
    xserver-xorg-video-trident
    xserver-xorg-video-tseng
    xserver-xorg-video-voodoo

    After, I installed the xorg-driver-fglrx package and all dependencies, via Synaptic.
    Next step, opened a terminal and typed:
    sudo aticonfig --initial -f
    Finally, I crossed my fingers and reboot. And I'm still here

    좋다. 여기까지 해주고 부팅해도 해상도 안맞아서 안뜨는건 마찬가지. (내 모니터에서..^^)

    Ctrl+Alt+F2 로, 콘솔 로그인 들어가서,
    /etc/X11/xorg.conf 파일 중 Screen 섹션을 아래와 같이 수정한다.

    Section "Screen"
        Identifier "aticonfig-Screen[0]-0"
        Device     "aticonfig-Device[0]-0"
        Monitor    "aticonfig-Monitor[0]-0"
        DefaultDepth     24
        SubSection "Display"
            Viewport   0 0
            Depth     24
            Modes "1280x1024"
        EndSubSection
    EndSection

    이러고 나서 재부팅 한번 해주면 끝~
    반응형
    블로그 이미지

    Good Joon

    IT Professionalist Since 1999

    ,
    마우스 설정 쪽에서 아무리 찾아봐도 Expose를 마우스 휠버튼에 할당하는 방법이 없고,
    환경설정의 Expose & Spaces 로 들어가면 온갖 옵션들이 다 나온다..


    위 어플 선택하고 들어가면, 아래 처럼 Expose 와 Space 모두 버튼할당 설정할 수 있다.

    위 화면은 space 설정 화면이고,


    이게 Expose 설정하는 화면이다.

    Command 나  Shift 버튼 등을 누른 상태에서 콤보를 열면 해당 키랑 조합해서 선택할 수 있게 값이 바뀐다.


    반응형
    블로그 이미지

    Good Joon

    IT Professionalist Since 1999

    ,